You can configure Group Policy settings for a specific set of users, and in this guide, you'll learn the steps to complete the task on Windows 10.
When you purchase through links on our site, we may earn an affiliate commission. Here’s how it works.
On Windows 10, the Local Group Policy Editor is a useful console that provides system administrators and tech-savvy users a central hub to customize advanced system settings, which otherwise wouldn't be possible using the Settings app or the legacy Control Panel.
The only caveat using this Microsoft Management Console (MMC) snap-in is that any policy you change will affect every user configured on the device since the built-in editor does not include an option to apply changes only for specific users.
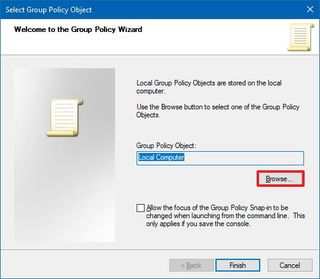
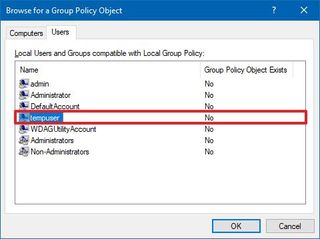
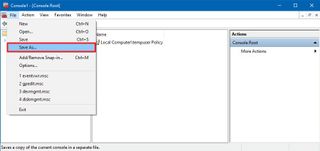
However, if you share a Windows 10 computer with other users, it's possible to create a User-Specific Local Group Policy (LGPO) snap-in (which you can save as a file) that will allow you to apply Group Policy settings to a specific user or group of users without changing your account experience.
In this Windows 10 guide, we'll walk you through the steps to change advanced system settings for a specific user or group.
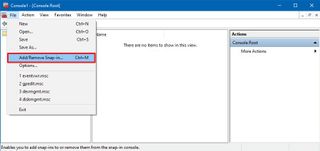
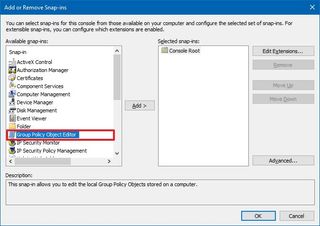
To configure advanced settings for specific users on Windows 10, use these steps:
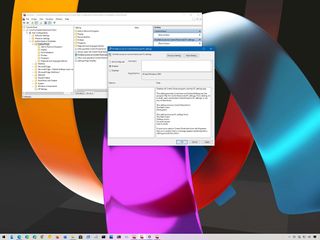
Once you complete the steps, you can use the new console to set custom policies that will only apply to that specific user or group of users.
For instance, if you share the device with other users, you can disable access to the Settings app and Control Panel to prevent users from making system changes, or you can customize the experience by enabling and disable certain features without affecting your account.
All the latest news, reviews, and guides for Windows and Xbox diehards.
By submitting your information you agree to the Terms & Conditions and Privacy Policy and are aged 16 or over.
We're focusing this guide on Windows 10, but since the Local Group Policy Editor has been around for a long time, the same instructions will also apply for Windows 8.1 and Windows 7.
Mauro Huculak has been a Windows How-To Expert contributor for WindowsCentral.com for nearly a decade and has over 15 years of experience writing comprehensive guides. He also has an IT background and has achieved different professional certifications from Microsoft, Cisco, VMware, and CompTIA. He has been recognized as a Microsoft MVP for many years.